Today’s card was made for the Freshly Made Sketches challenge #690- but I was a day late in being able to post it because I thought it finished on Wednesday but it finished Monday. Oh well, I will know for next week.
I loved the simplicity of this sketch and it prompted me to use some designer series paper.
I’ve chosen to use the Boho Vibes Suite collection for this card- the Boho vibes DSP for the background and the sunshine vibes dies. I’ve chosen not to add a sentiment to this card because I think it could be used for so many different purposes.


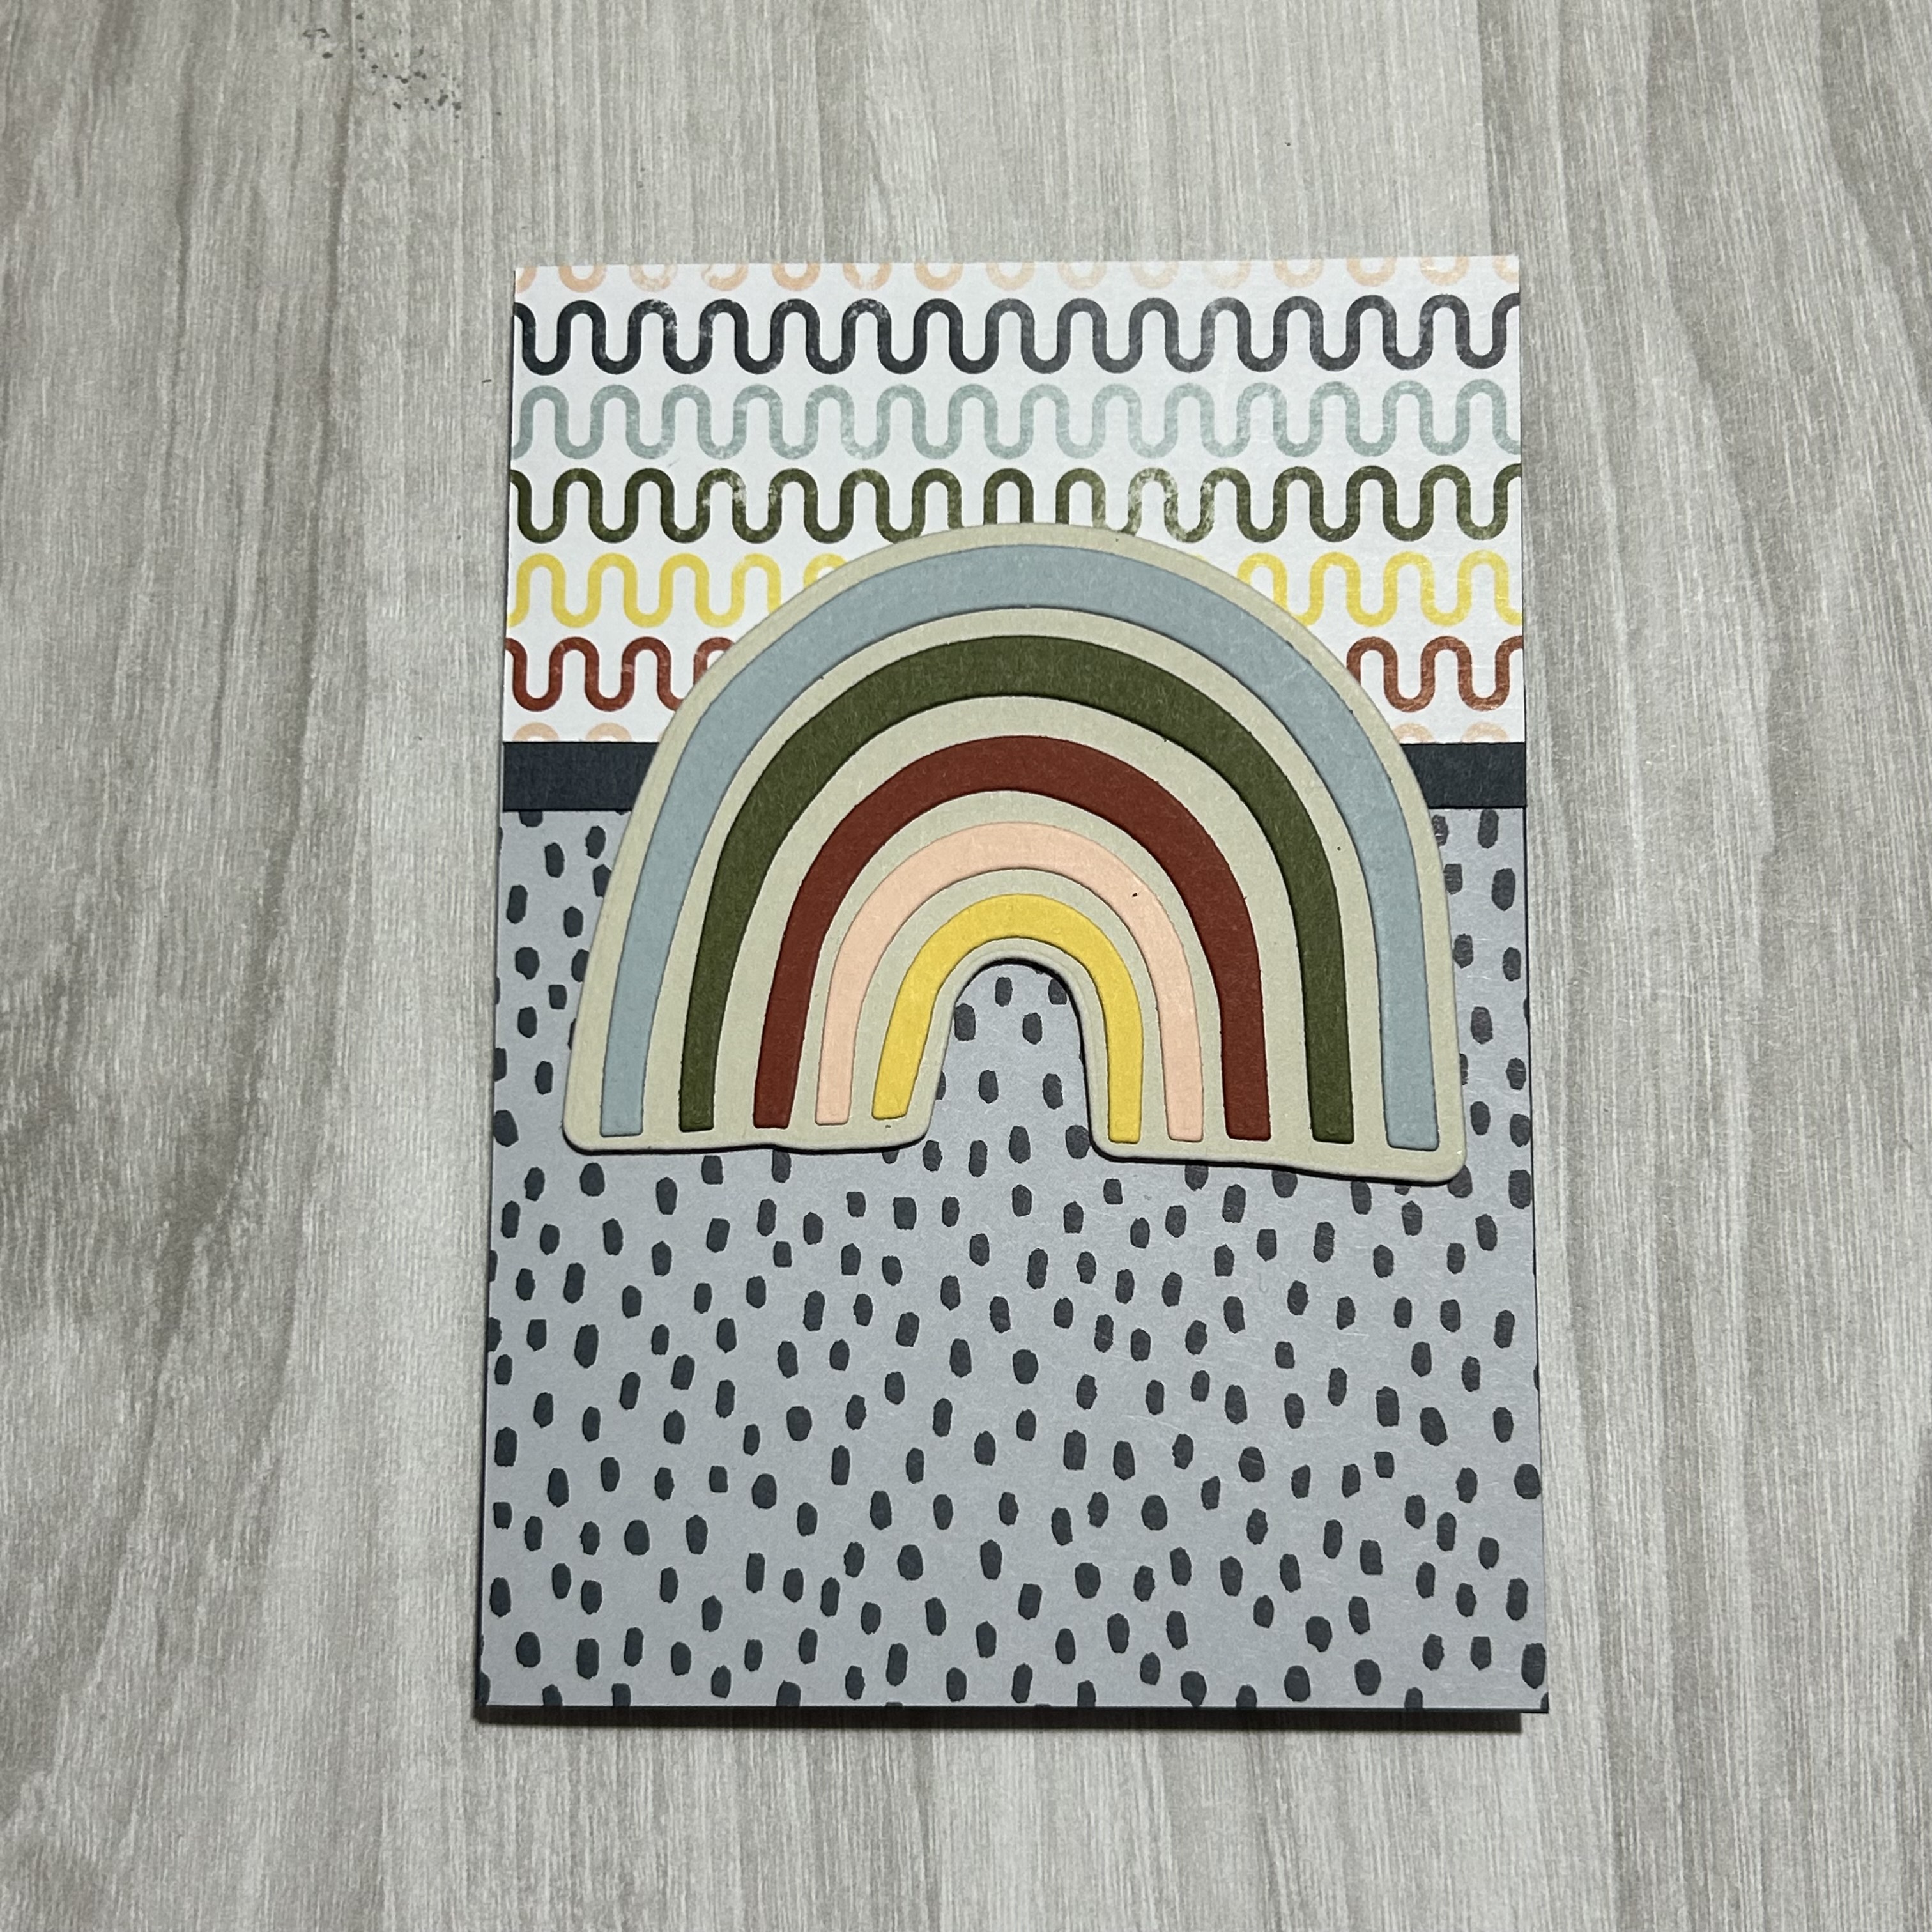
Once I started making cards using this sketch, I couldn’t stop so I also made 5 more- this time using the rainbow die. The really cool thing with this die is that if you cut the rainbow on 5 different colours, you can make 5 different rainbows to add onto your cards.
After I took these photos, I did add some of the Muted Palette dots for a little bling- but I forgot to take photos!


If you live in Australia and don't already have a Stampin' Up! Demonstrator, please reach out I would love to help you.
Until next time,
Happy Crafting


![Bloom Impressions 12" X 12" (30.5 X 30.5 Cm) Designer Series Paper [ 164944 ]](https://assets1.tamsnetwork.com/images/EC042017NF/164944s.jpg "Bloom Impressions 12\" X 12\" (30.5 X 30.5 Cm) Designer Series Paper [ 164944 ]")
![Regals 12" X 12" (30.5 X 30.5 Cm) Cardstock [ 161713 ]](https://assets1.tamsnetwork.com/images/EC042017NF/161713s.jpg "Regals 12\" X 12\" (30.5 X 30.5 Cm) Cardstock [ 161713 ]")
![Basic White A4 Cardstock [ 166781 ]](https://assets1.tamsnetwork.com/images/EC042017NF/166781s.jpg "Basic White A4 Cardstock [ 166781 ]")
![Melon Mambo A4 Card Stock [ 119980 ]](https://assets1.tamsnetwork.com/images/EC042017NF/119980s.jpg "Melon Mambo A4 Card Stock [ 119980 ]")
![Saying Something Mix & Match Ephemera Pack (English) [ 163761 ]](https://assets1.tamsnetwork.com/images/EC042017NF/163761s.jpg "Saying Something Mix & Match Ephemera Pack (English) [ 163761 ]")
![Fully Flowering Mix & Match Ephemera Pack [ 163762 ]](https://assets1.tamsnetwork.com/images/EC042017NF/163762s.jpg "Fully Flowering Mix & Match Ephemera Pack [ 163762 ]")
![Paper Trimmer [ 152392 ]](https://assets1.tamsnetwork.com/images/EC042017NF/152392s.jpg "Paper Trimmer [ 152392 ]")
![Multipurpose Liquid Glue [ 110755 ]](https://assets1.tamsnetwork.com/images/EC042017NF/110755s.jpg "Multipurpose Liquid Glue [ 110755 ]")


![Darling Dinos Bundle (English) [ 164735 ]](https://assets1.tamsnetwork.com/images/EC042017NF/164735s.jpg "Darling Dinos Bundle (English) [ 164735 ]")
![Darling Dinos Dies [ 164734 ]](https://assets1.tamsnetwork.com/images/EC042017NF/164734s.jpg "Darling Dinos Dies [ 164734 ]")
![Darling Dinos Photopolymer Stamp Set (English) [ 164728 ]](https://assets1.tamsnetwork.com/images/EC042017NF/164728s.jpg "Darling Dinos Photopolymer Stamp Set (English) [ 164728 ]")
![Serene Love 12" X 12" (30.5 X 30.5 Cm) Designer Series Paper [ 166261 ]](https://assets1.tamsnetwork.com/images/EC042017NF/166261s.jpg "Serene Love 12\" X 12\" (30.5 X 30.5 Cm) Designer Series Paper [ 166261 ]")
![Old Olive A4 Card Stock [ 106576 ]](https://assets1.tamsnetwork.com/images/EC042017NF/106576s.jpg "Old Olive A4 Card Stock [ 106576 ]")
![Pumpkin Pie A4 Card Stock [ 108601 ]](https://assets1.tamsnetwork.com/images/EC042017NF/108601s.jpg "Pumpkin Pie A4 Card Stock [ 108601 ]")
![Pool Party A4 Card Stock [ 124391 ]](https://assets1.tamsnetwork.com/images/EC042017NF/124391s.jpg "Pool Party A4 Card Stock [ 124391 ]")
![Card Stock A4 Coastal Cabana [ 131302 ]](https://assets1.tamsnetwork.com/images/EC042017NF/131302s.jpg "Card Stock A4 Coastal Cabana [ 131302 ]")
![Pool Party Classic Stampin' Pad [ 147107 ]](https://assets1.tamsnetwork.com/images/EC042017NF/147107s.jpg "Pool Party Classic Stampin' Pad [ 147107 ]")
![Granny Apple Green Stampin' Pad [ 147095 ]](https://assets1.tamsnetwork.com/images/EC042017NF/147095s.jpg "Granny Apple Green Stampin' Pad [ 147095 ]")
![Balmy Blue Classic Stampin' Pad [ 147105 ]](https://assets1.tamsnetwork.com/images/EC042017NF/147105s.jpg "Balmy Blue Classic Stampin' Pad [ 147105 ]")
![Old Olive Classic Stampin' Pad [ 147090 ]](https://assets1.tamsnetwork.com/images/EC042017NF/147090s.jpg "Old Olive Classic Stampin' Pad [ 147090 ]")
![Shaded Spruce Stampin' Blends Combo Pack [ 154903 ]](https://assets1.tamsnetwork.com/images/EC042017NF/154903s.jpg "Shaded Spruce Stampin' Blends Combo Pack [ 154903 ]")
![Melon Mambo Stampin' Blends Combo Pack [ 153112 ]](https://assets1.tamsnetwork.com/images/EC042017NF/153112s.jpg "Melon Mambo Stampin' Blends Combo Pack [ 153112 ]")
![Daffodil Delight Stampin' Blends Combo Pack [ 154883 ]](https://assets1.tamsnetwork.com/images/EC042017NF/154883s.jpg "Daffodil Delight Stampin' Blends Combo Pack [ 154883 ]")
![Pumpkin Pie Stampin' Blends Combo Pack [ 154897 ]](https://assets1.tamsnetwork.com/images/EC042017NF/154897s.jpg "Pumpkin Pie Stampin' Blends Combo Pack [ 154897 ]")
![Fresh Freesia Stampin' Blends Combo Pack [ 155518 ]](https://assets1.tamsnetwork.com/images/EC042017NF/155518s.jpg "Fresh Freesia Stampin' Blends Combo Pack [ 155518 ]")
![Blueberry Bushel Stampin’ Blends Combo Pack [ 161679 ]](https://assets1.tamsnetwork.com/images/EC042017NF/161679s.jpg "Blueberry Bushel Stampin’ Blends Combo Pack [ 161679 ]")
![Real Red Stampin' Blends Combo Pack [ 154899 ]](https://assets1.tamsnetwork.com/images/EC042017NF/154899s.jpg "Real Red Stampin' Blends Combo Pack [ 154899 ]")
![Flirty Flamingo Stampin' Blends Combo Pack [ 154884 ]](https://assets1.tamsnetwork.com/images/EC042017NF/154884s.jpg "Flirty Flamingo Stampin' Blends Combo Pack [ 154884 ]")
![Mini Stampin' Cut & Emboss Machine [ 150673 ]](https://assets1.tamsnetwork.com/images/EC042017NF/150673s.jpg "Mini Stampin' Cut & Emboss Machine [ 150673 ]")


