Hello and Welcome back.
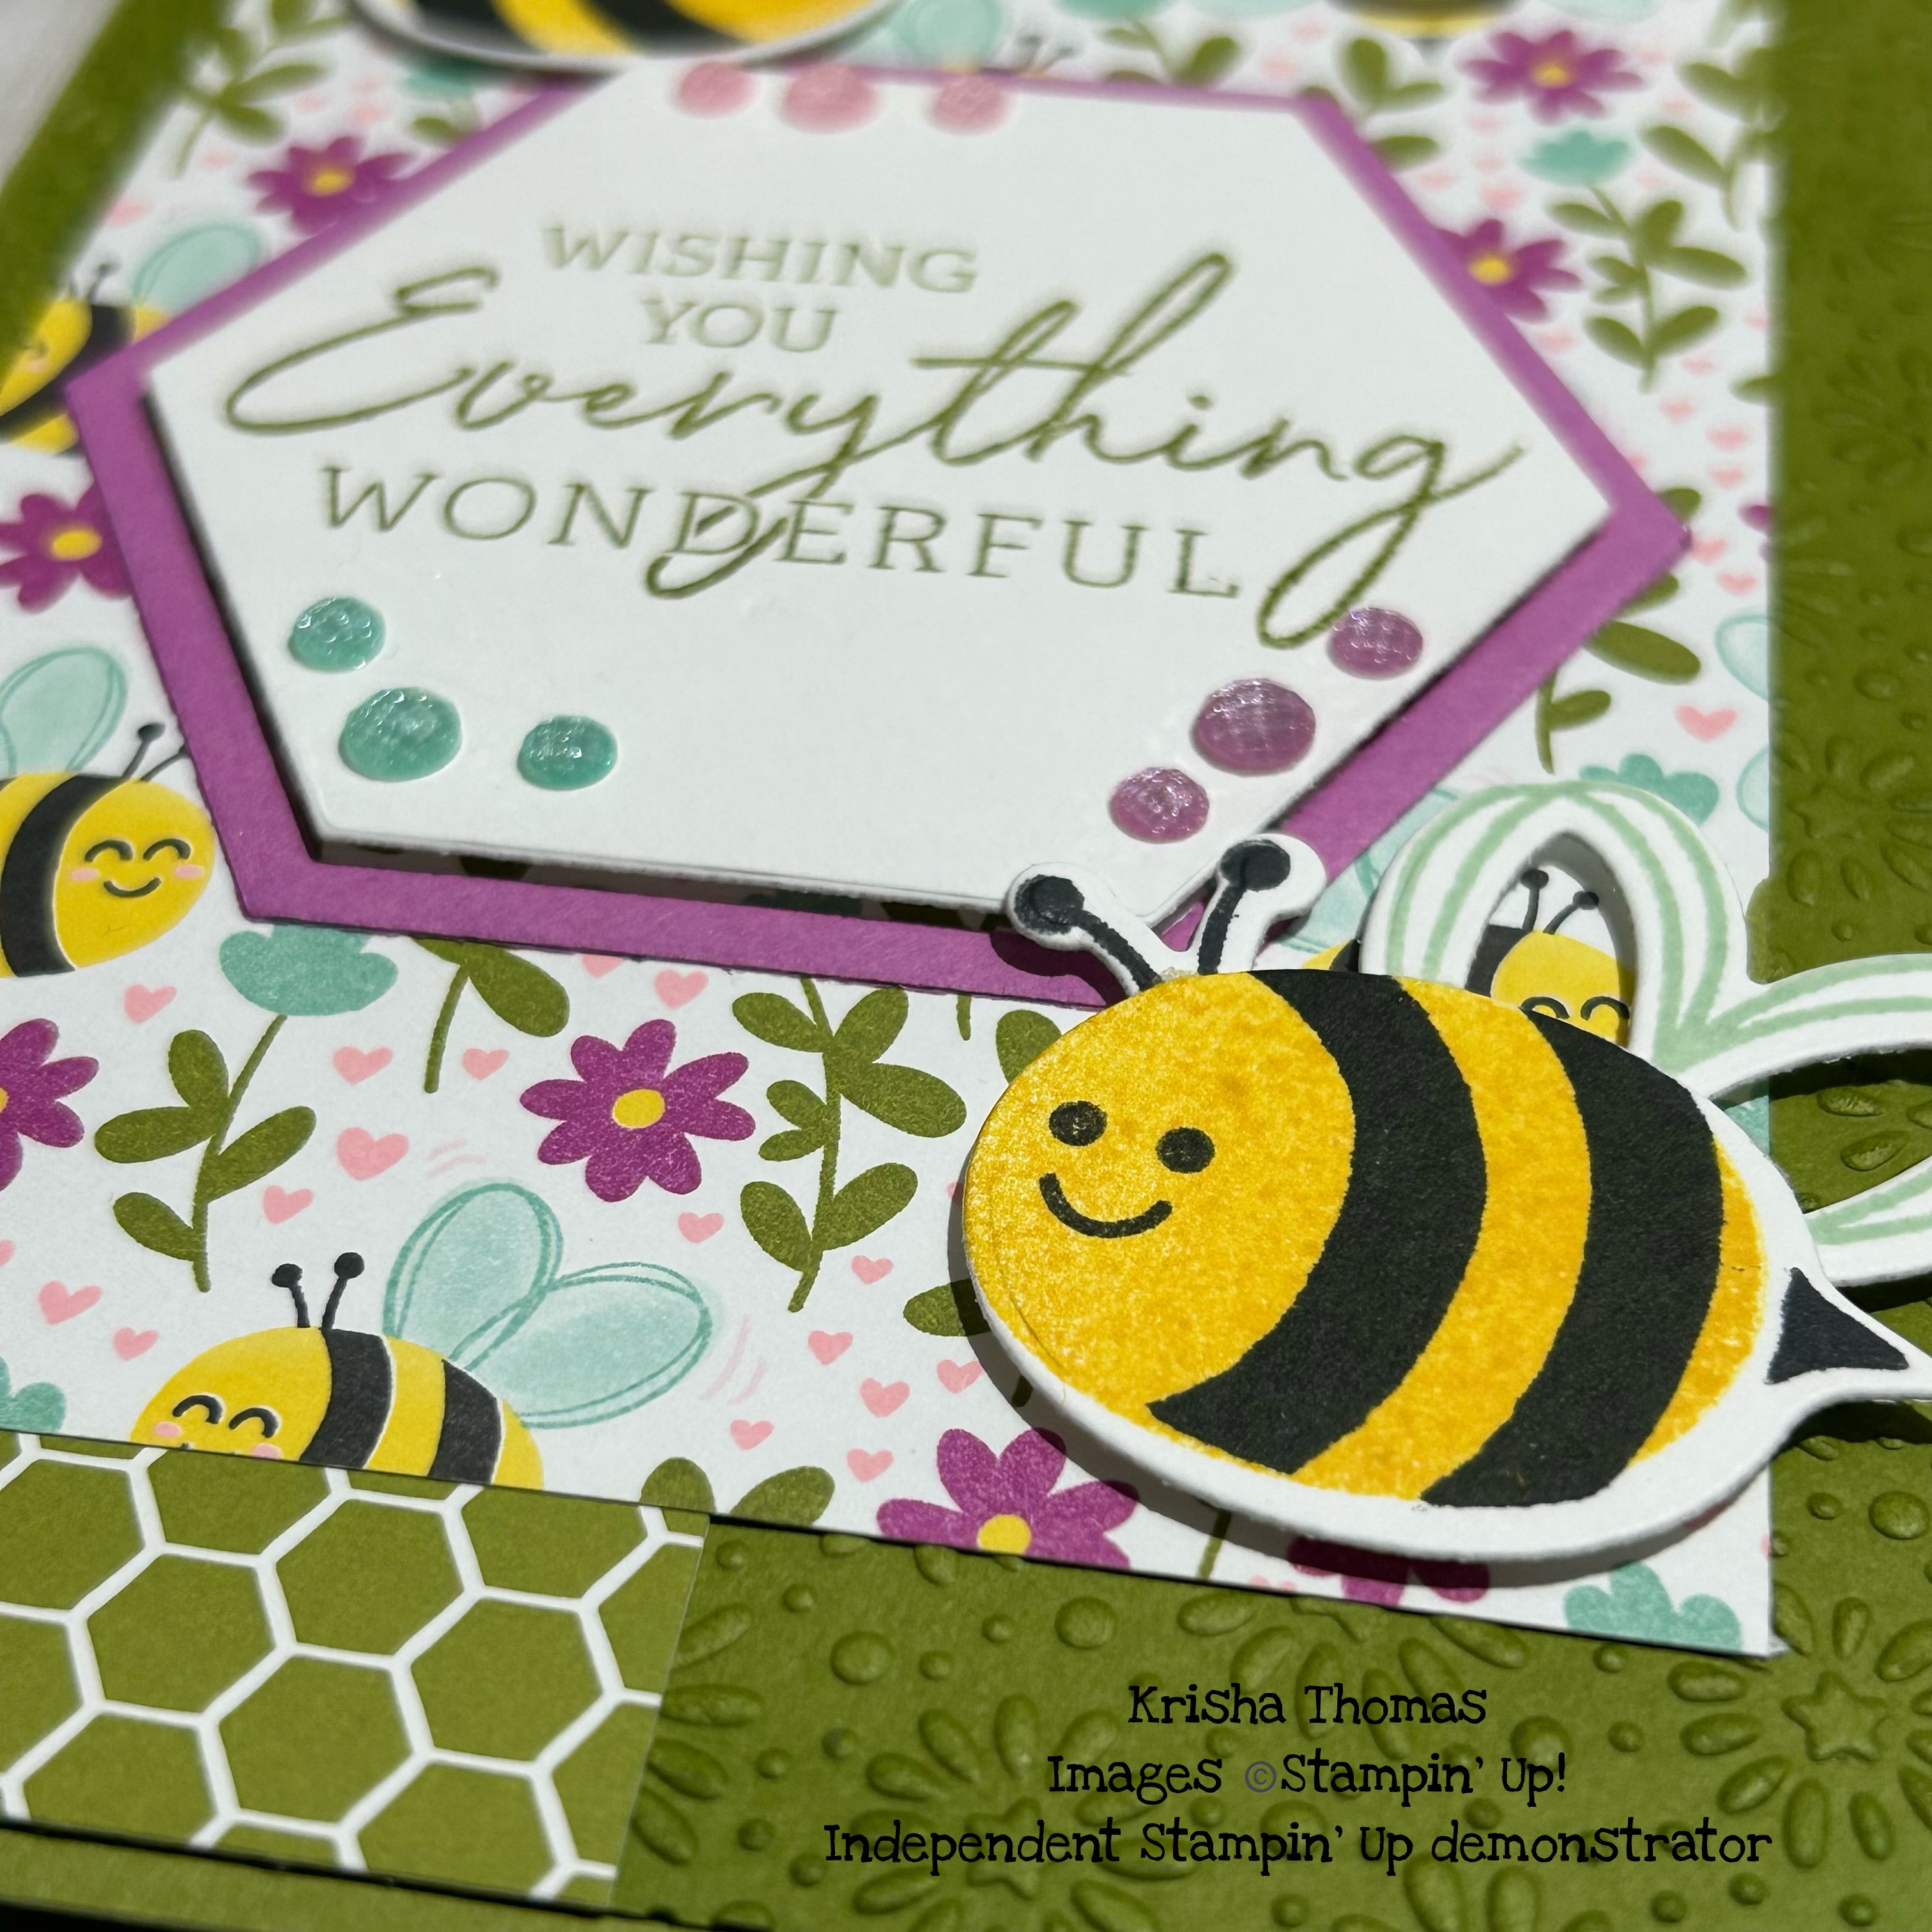
I came across another blog that showcased this amazing fun fold card and was determined to give it ago myself. This fantastic fold is called a W-V fold card and it get's it's name from the two shapes the folds of the card makes - the W folds on the front of the card and V that joins the 2 mountain folds of the W.
It took a little longer than usual to make this card, because I wanted to use the hexagons from the Meant to Bee dies for the V shape and it required a little bit of concentration to get the placement right.
To make this card you need ( I have included cm measurements, however they might not be exact as I rather working in inches).
Card base: 5 1/2 x 11" scored on the long side at 1 3/4", 3 1/2", 5 1/4" and 7"
14 x 28 cm scored at 4.4, 8.8, 13.3 and 17.7 cm
DSP: 1 1/2 x 5 1/4 (cut 4) W fold strips (3.8 x 13.3 cm)
3 1/2 x 5 1/4 Back of card (9.5 x 13.3 cm)
V fold: 6 x 3 1/2" piece Old Olive Card, scored at 3 and folded in half, then cut out using the Hexagon die. Make sure that you place one end of the hexagon die off the end of the platform so that you don't cut all the way through it and create the V fold.
Have other scraps of DSP and Card to decorate the hexagons and add other decorations as required.
If you live in Australia and don't already have a Stampin' Up! Demonstrator, please reach out I would love to help you. You can also find all the items I have used listed below with links to my online store.
Until next time,
Happy Crafting

![Meant To Bee Bundle (English) [ 167243 ]](https://assets1.tamsnetwork.com/images/EC042017NF/167243s.jpg "Meant To Bee Bundle (English) [ 167243 ]")
![Meant To Bee Dies [ 166582 ]](https://assets1.tamsnetwork.com/images/EC042017NF/166582s.jpg "Meant To Bee Dies [ 166582 ]")
![Starstruck Embossing Folder [ 164972 ]](https://assets1.tamsnetwork.com/images/EC042017NF/164972s.jpg "Starstruck Embossing Folder [ 164972 ]")
![Old Olive A4 Card Stock [ 106576 ]](https://assets1.tamsnetwork.com/images/EC042017NF/106576s.jpg "Old Olive A4 Card Stock [ 106576 ]")
![Petunia Pop A4 Cardstock [ 163802 ]](https://assets1.tamsnetwork.com/images/EC042017NF/163802s.jpg "Petunia Pop A4 Cardstock [ 163802 ]")
![Basic White A4 Cardstock [ 166781 ]](https://assets1.tamsnetwork.com/images/EC042017NF/166781s.jpg "Basic White A4 Cardstock [ 166781 ]")
![Pool Party Classic Stampin' Pad [ 147107 ]](https://assets1.tamsnetwork.com/images/EC042017NF/147107s.jpg "Pool Party Classic Stampin' Pad [ 147107 ]")
![Tuxedo Black Memento Ink Pad [ 132708 ]](https://assets1.tamsnetwork.com/images/EC042017NF/132708s.jpg "Tuxedo Black Memento Ink Pad [ 132708 ]")
![Old Olive Classic Stampin' Pad [ 147090 ]](https://assets1.tamsnetwork.com/images/EC042017NF/147090s.jpg "Old Olive Classic Stampin' Pad [ 147090 ]")
![2024–2026 In Color™ Shimmer Gems [ 163781 ]](https://assets1.tamsnetwork.com/images/EC042017NF/163781s.jpg "2024–2026 In Color™ Shimmer Gems [ 163781 ]")
![Blending Brushes [ 153611 ]](https://assets1.tamsnetwork.com/images/EC042017NF/153611s.jpg "Blending Brushes [ 153611 ]")
![Small Blending Brushes [ 160518 ]](https://assets1.tamsnetwork.com/images/EC042017NF/160518s.jpg "Small Blending Brushes [ 160518 ]")
![Stampin' Dimensionals [ 104430 ]](https://assets1.tamsnetwork.com/images/EC042017NF/104430s.jpg "Stampin' Dimensionals [ 104430 ]")
![Cute As Can Bee 12" X 12" (30.5 X 30.5 Cm) Designer Series Paper [ 166621 ]](https://assets1.tamsnetwork.com/images/EC042017NF/166621s.jpg "Cute As Can Bee 12\" X 12\" (30.5 X 30.5 Cm) Designer Series Paper [ 166621 ]")
![Meant To Bee Photopolymer Stamp Set (English) [ 166583 ]](https://assets1.tamsnetwork.com/images/EC042017NF/166583s.jpg "Meant To Bee Photopolymer Stamp Set (English) [ 166583 ]")
![Daffodil Delight Classic Stampin' Pad [ 147094 ]](https://assets1.tamsnetwork.com/images/EC042017NF/147094s.jpg "Daffodil Delight Classic Stampin' Pad [ 147094 ]")


![Daffodil Delight A4 Card Stock [ 121680 ]](https://assets1.tamsnetwork.com/images/EC042017NF/121680s.jpg "Daffodil Delight A4 Card Stock [ 121680 ]")
![Petunia Pop Classic Stampin Pad [ 163811 ]](https://assets1.tamsnetwork.com/images/EC042017NF/163811s.jpg "Petunia Pop Classic Stampin Pad [ 163811 ]")
![Bubble Bath Classic Stampin' Pad [ 161664 ]](https://assets1.tamsnetwork.com/images/EC042017NF/161664s.jpg "Bubble Bath Classic Stampin' Pad [ 161664 ]")
![Stampin' Cut & Emboss Machine [ 149653 ]](https://assets1.tamsnetwork.com/images/EC042017NF/149653s.jpg "Stampin' Cut & Emboss Machine [ 149653 ]")
![Mini Stampin' Cut & Emboss Machine [ 150673 ]](https://assets1.tamsnetwork.com/images/EC042017NF/150673s.jpg "Mini Stampin' Cut & Emboss Machine [ 150673 ]")


![Bee My Valentine Photopolymer Stamp Set (English) [ 162547 ]](https://assets1.tamsnetwork.com/images/EC042017NF/162547s.jpg "Bee My Valentine Photopolymer Stamp Set (English) [ 162547 ]")
![Bee My Valentine Bundle (English) [ 162554 ]](https://assets1.tamsnetwork.com/images/EC042017NF/162554s.jpg "Bee My Valentine Bundle (English) [ 162554 ]")
![Bee Builder Punch [ 162553 ]](https://assets1.tamsnetwork.com/images/EC042017NF/162553s.jpg "Bee Builder Punch [ 162553 ]")
![Bubble Bath A4 Cardstock [ 161727 ]](https://assets1.tamsnetwork.com/images/EC042017NF/161727s.jpg "Bubble Bath A4 Cardstock [ 161727 ]")
![Petunia Pop 3/8" (1 Cm) Bordered Ribbon [ 163785 ]](https://assets1.tamsnetwork.com/images/EC042017NF/163785s.jpg "Petunia Pop 3/8\" (1 Cm) Bordered Ribbon [ 163785 ]")
![Bubble Bath Classic Stampin' Ink Refill [ 161670 ]](https://assets1.tamsnetwork.com/images/EC042017NF/161670s.jpg "Bubble Bath Classic Stampin' Ink Refill [ 161670 ]")
![Petunia Pop Classic Stampin’ Ink Refill [ 163820 ]](https://assets1.tamsnetwork.com/images/EC042017NF/163820s.jpg "Petunia Pop Classic Stampin’ Ink Refill [ 163820 ]")
![Daffodil Delight Classic Stampin' Ink Refill [ 119672 ]](https://assets1.tamsnetwork.com/images/EC042017NF/119672s.jpg "Daffodil Delight Classic Stampin' Ink Refill [ 119672 ]")
![Paper Trimmer [ 152392 ]](https://assets1.tamsnetwork.com/images/EC042017NF/152392s.jpg "Paper Trimmer [ 152392 ]")
![Multipurpose Liquid Glue [ 110755 ]](https://assets1.tamsnetwork.com/images/EC042017NF/110755s.jpg "Multipurpose Liquid Glue [ 110755 ]")
![Stampin' Seal [ 152813 ]](https://assets1.tamsnetwork.com/images/EC042017NF/152813s.jpg "Stampin' Seal [ 152813 ]")
![Stampin' Seal Refill [ 152814 ]](https://assets1.tamsnetwork.com/images/EC042017NF/152814s.jpg "Stampin' Seal Refill [ 152814 ]")


